
In a previous post, Dynamic Range Test – Canon 5D MK IV, we illustrated that 8 stops appears to be the practical dynamic exposure range of a current well-regarded DSLR camera. Now we wish to take a look at what that might mean visually for images that you may take.
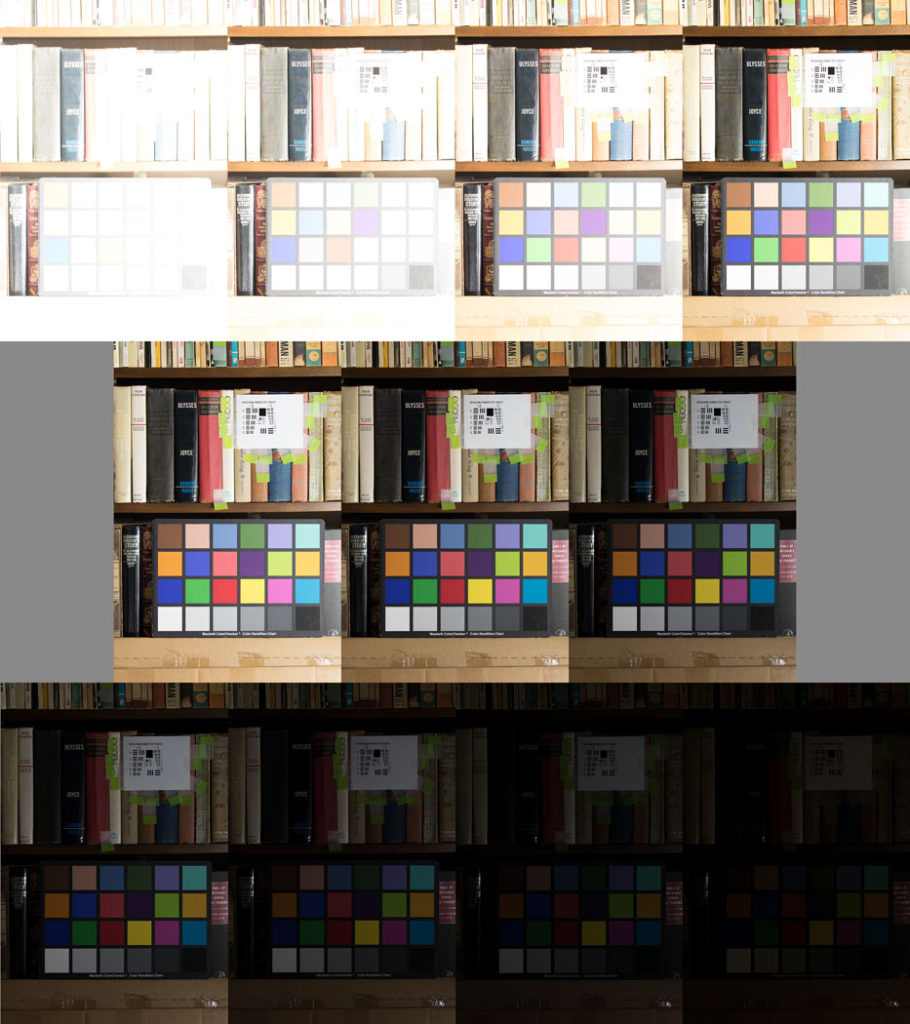
For this test series a Canon 5D Mk IV set to ISO 400 was used with a Canon EF 100-400 mm F4 .5-5.6L IS II USM lens set to 135 mm at F8 to photograph a Macbeth Color Checker chart set up on a bookcase. Once the “0” exposure was determined, it was varied +/- 5 stops in one stop increments by varying the exposure time. Focus was held constant by switching off autofocus on the lens. See the chart below that shows the 11 exposures taken:
As can be seen, at +/- 1 stop around neutral, things don’t look too bad. +/- 2 stops however appears to be pushing it, and anything beyond that looks hopeless! But we do after all have Camera Raw, and if you shoot your photographs in RAW (which you should if you wish to obtain maximum image quality) you may have a chance of being able to rescue mal-exposed images. But the real question is what will be the resultant quality?
To effect the recovery, the 11bracket images were brought from Adobe Bridge CC into Adobe Camera Raw. There the exposure slider was moved in one stop increments in the opposite direction of the 1-stop exposure bias increments given to the test images. These files were then moved into Photoshop CC 2018 where the neutral gray, red, green, and blue Macbeth Color Checker patches were measured with the eyedropper tool set to L*ab measuring mode and a 101 x 101 pixel average sample size. The chart below shows the results:
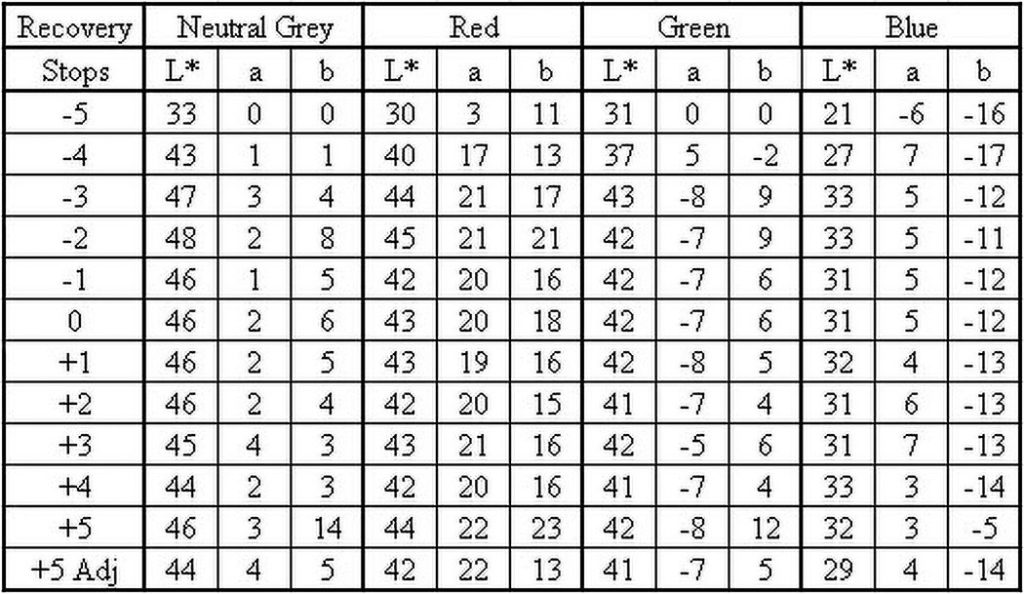
The data shows that, numerically, it appears possible to satisfactorily recover images that were overexposed by 3 stops to being underexposed by 4 stops. However, the 5-stop underexposed image had a yellow color cast. An attempt was made to correct this by numerically matching the neutral grey patch L*ab reading of this image as closely as possible with that of the neutral exposure. This was done by converting the file into L*ab mode and applying a -3 Magenta and -37 Blue correction using the color balance tool. The file was then converted back to RGB mode. However, while this move did indeed improve the overall color balance of the -5 stop image, it was visually apparent that the color balance in other parts of the image still did not properly match the reference “0” exposure. So while a 5-stop under exposure rescue may work in some instances, its circumstances should be avoided.
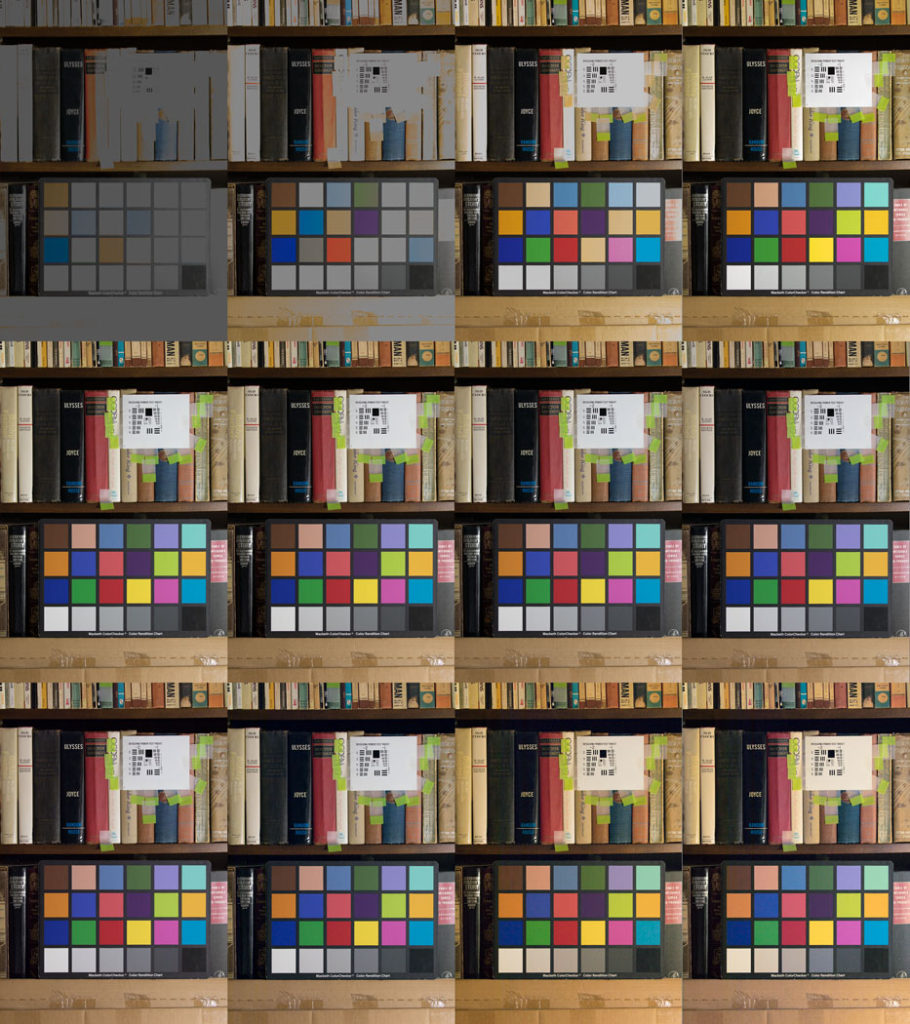
The corrected file results, below, go left-to-right from the 5-stop over exposure (top left) to the corrected 5-stop under exposed color balance corrected exposure (bottom right). The visual result appears at first glance to confirm the earlier numerical result:
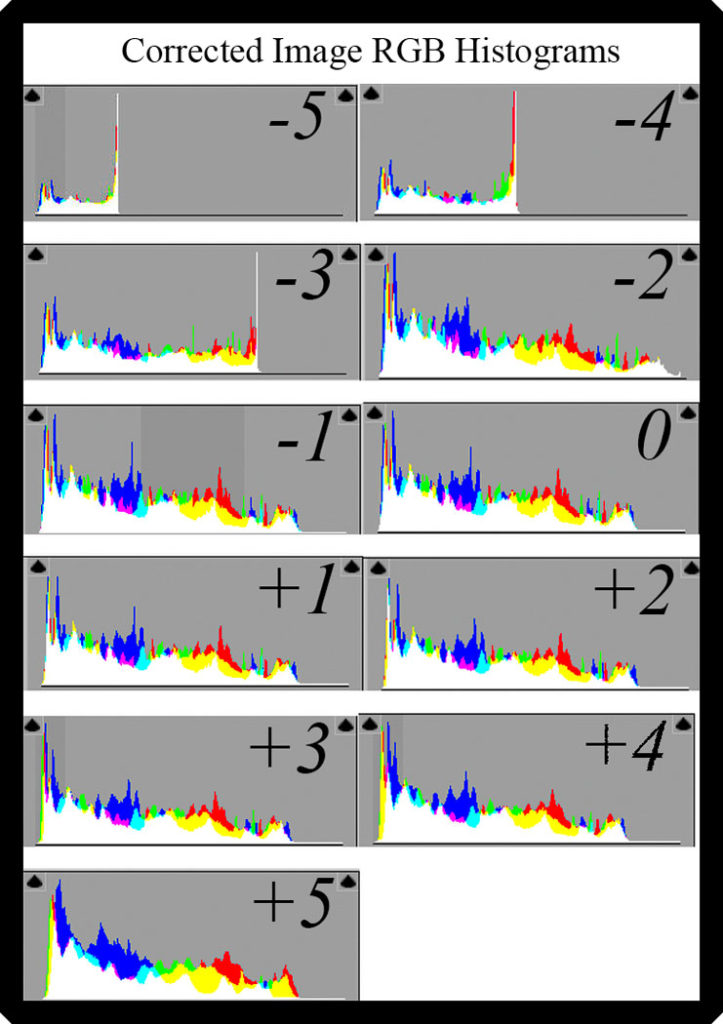
But is that the whole story? Close inspection of the corrected image RGB histograms, below, which plot number of pixels vs luminosity, tells us a slightly different story. The -5 and -4-stop histogram luminance ranges are severely truncated and colors are clipped and missing. The -3-stop histogram shows a truncated luminance range. The result visually in this case is slightly desaturated color. The -2-stop image is a bit of a surprise, as the stretched luminance range exceeds that of the reference image. This is at the expense of some highlight clipping and color shift which accentuates of some colors. If you look at the white background of the USAF 1951 Test Target, you can see that it is brighter here than in the other corrected images, and that some of the colors of the Macbeth chart are slightly brighter, particularly yellow. The -1 to +2-stop correction histograms closely resemble the “0” reference. Surprisingly, the +3 and +4-stop correction histograms show the correct luminance range, but at the expense of slightly duller colors. The -5-stop correction on the other hand shows significant color shift; and, as we have seen, is not totally correctable.
In many articles and books on photography these days one often sees the advice to “expose to the right”. In other words, bias your exposure toward “over exposure” without clipping the histogram. This is good advice, particularly if you are shooting at high ISO’s, as this practice helps lower image noise. But, as we have seen here, this needs to be done with caution, as there appears, from this study at least, that there is less latitude for correction on the over exposure side than the underexposure side. This subject of image noise will be dealt with in an upcoming post, Noise Tests – Canon 5D Mk IV. Here the subject of noise vs ISO for nominaly exposed images is explored as well those recovered from a 3-stop underexposure.